VM esxi guest performance collect
intro
내부적으로 수행하는 프로젝트에서 우연히 VM 내부 게스트의 CPU, Memory, Disk 등을 수집하는 프로젝트를 맡게 되었습니다.
대상 서버는 KVM, VM esxi, Xen server 였는데 그중 VM esxi 를 수집했던 일을 적어 보려고 합니다.
VM esxi
VM esxi 는 쉽게 생각하자면 VMware 의 OS 버전으로 관리의 용이한 커널/프로그램 등을 모아놓은 하나의 플랫폼이라고 볼수 있습니다.
맨 처음에 찾은 이중 VM 의 설치되어 있는 guest 의 퍼포먼스 데이터를 수집하는 방법은 libvirt 라는 라이브러리를 사용하여 수집하는 방식이었습니다.
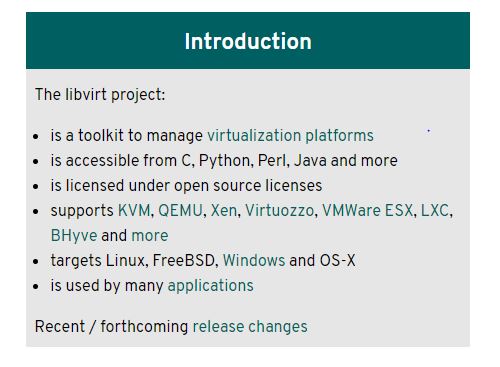
홈페이지에 나와 있는 지원 목록입니다. KVM, Xen, VMWare 등 모든 VM 을 다 지원하기 때문에 진행하는 프로젝트에 안성 맞춤이기 때문에 이 라이브러리를 사용하기로 했습니다.
install libvirt
libvirt 는 설치하기 위해서 CentOS7 에서는 libvirt 패키지 및 libvirt-dev 패키지를 미리 yum 을 통해서 설치한 후 pip 를 통하여 설치가 가능합니다.
yum install libvirt libvirt-devel pip3.6 install libvirt-python
dev
대략 다음과 같은 소스가 나왔습니다.
uri = 'esx://x.x.x.x/?no_verify=1'

import libvirt

SASL_USER = "root"
SASL_PASS = "xxxx"

def request_cred(credentials, user_data):
    for credential in credentials:
        if credential[0] == libvirt.VIR_CRED_AUTHNAME:
            credential[4] = SASL_USER
        elif credential[0] == libvirt.VIR_CRED_PASSPHRASE:
            credential[4] = SASL_PASS
    return 0

auth = [[libvirt.VIR_CRED_AUTHNAME, libvirt.VIR_CRED_PASSPHRASE], request_cred, None]

conn = libvirt.openAuth(uri, auth, 0)
if conn == None:
    # 연결 실패시
    exit(-1)

domainIDs = conn.listDomainsID()
if domainIDs == None:
    print('Failed to get a list of domain IDs')

print("############## HOST DATA ###############")
print("Active domain IDs:")
if len(domainIDs) == 0:
    print('  None')
else:
    for domainID in domainIDs:
        virt_machine = conn.lookupByID(domainID)
        print('  '+str(virt_machine.name()))  # VM 이름
        print('  '+str(virt_machine.hostname()))  # 호스트 이름

conn.close()
실행 결과… 오류가 발생했습니다!
libvirt.libvirtError: this function is not supported by the connection driver: virDomainGetHostname
앗… 무슨일일까요
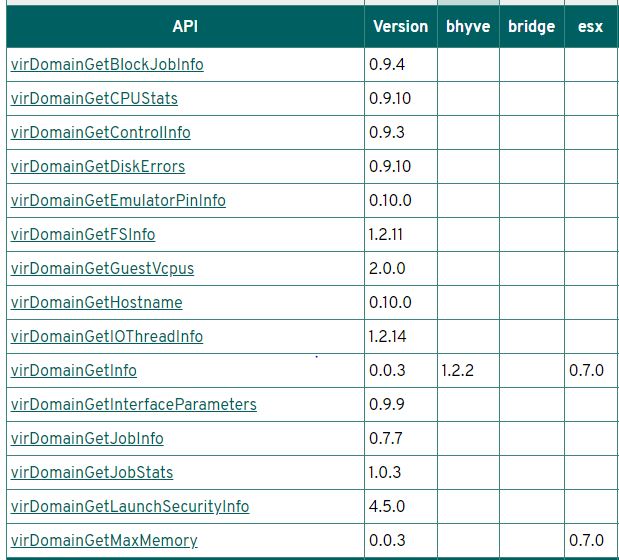
알고보니 libvirt 는 다음과 같이 esxi 가 지원을 하지 않기 때문에 일어나는 일이었습니다…
몇몇 guest 의 API 는 지원을 하나… 대부분은 지원을 하지 않고 있었습니다.
위에 소스는 QEMU 같은 경우에는 사용할수 있겠지만…
그럼… 어쩌지
사실 알고보니 VM esxi 자체 API 를 사용하는 방법이 있었습니다.
알고보니 있다 싶은 모듈은 거의 다 있는 파이썬용 모듈까지 pyvmomi 라는 이름으로 존재하고 있었습니다.
다만 소스 자체와 데이터 맵핑은 조금 복잡합니다.
https://github.com/vmware/pyvmomi-community-samples – Example 입니다.
from pyVmomi import vim
from pyVim.connect import SmartConnectNoSSL, Disconnect

si = SmartConnectNoSSL(
            host='x.x.x.x',
            user='root',
            pwd='xxx')

content = si.RetrieveContent()
perfManager = content.perfManager

counterInfo = {}
# {'cpu.usage.none': 0, 'cpu.usage.average': 1, 'cpu.usage.maximum': 2, ... }
for c in perfManager.perfCounter:
    prefix = c.groupInfo.key
    fullName = c.groupInfo.key + "." + c.nameInfo.key + "." + c.rollupType
    counterInfo[fullName] = c.key

print(counterInfo)

container = content.rootFolder
viewType = [vim.VirtualMachine]
recursive = True

containerView = content.viewManager.CreateContainerView(container, viewType, recursive)
children = containerView.view

for child in children:
    # Get all available metric IDs for this VM
    counterIDs = [m.counterId for m in
                  perfManager.QueryAvailablePerfMetric(entity=child)]

    # Using the IDs form a list of MetricId
    # objects for building the Query Spec
    metricIDs = [vim.PerformanceManager.MetricId(counterId=c,
                                                 instance="*")
                 for c in counterIDs]

    # Build the specification to be used
    # for querying the performance manager
    spec = vim.PerformanceManager.QuerySpec(maxSample=1,
                                            entity=child,
                                            metricId=metricIDs)
    # Query the performance manager
    # based on the metrics created above
    result = perfManager.QueryStats(querySpec=[spec])

    print(result, child.summary.config.name)
다음 소스를 통하면 다음과 같은 세종류의 결과물이 나옵니다.
항목명 및 ID 맵핑정보입니다.
{‘cpu.usage.none’: 0, ‘cpu.usage.average’: 1, ‘cpu.usage.maximum’: 2, ‘cpu.usage.minimum’: 3 … }
실제 VM 의 데이터입니다.
(vim.PerformanceManager.IntSeries) { dynamicType =
, dynamicProperty = (vmodl.DynamicProperty) [], id = (vim.PerformanceManager.MetricId) { dynamicType = , dynamicProperty = (vmodl.DynamicProperty) [], counterId = 1, instance = '' }, value = (long) [ 0 ] }
VM 의 이름입니다.
… CentOS 7 (64-bit)
항목명 및 ID 맵핑정보를 보자면, counterId 와 항목명의 ID 를 맵핑이 가능하며,
위의 중간 데이터를 확인해보시면 counterId 값이 1 인것을 볼 수 있습니다.
이는 cpu.usage.average 의 데이터라는 것을 알수 있으며, value 는 0인것을 확인할수 있습니다.
이런 식으로 340 가지의 여러가지 정보를 얻을 수 있습니다.
마치며
이렇듯 esxi 를 수집하기 위해서 많은 삽질을 통했지만, 위의 libvirt 같은 경우에는 VM esxi 를 통해 수집할수 없었지만 QEMU 같은 경우에는 위의 방법을 사용해서 수집이 가능하고,
결론적으로는 esxi 를 pyVmomi 통하여 수집할수 있었습니다.


